Introduction
If you’ve ever admired those dreamy streaks of light in professional photos, chances are you’ve seen the effect of a photeeq lens flare. This popular editing technique adds a cinematic glow, bringing warmth, depth, and emotion to your images. Whether you’re a beginner or an experienced photographer, understanding how to use lens flare effectively can elevate your visuals instantly.
In this guide, you’ll learn what photeeq lens flare is, how it works, and how to use it creatively without overdoing it. Let’s dive in.
What Is Photeeq Lens Flare?
A photeeq lens flare refers to a digital or natural light effect where bright light scatters inside a camera lens, creating visible artifacts such as streaks, halos, or glowing orbs.
Key Characteristics
- Occurs when shooting toward a strong light source
- Produces artistic light streaks or haze
- Can be natural or added during editing
- Enhances mood and storytelling
Why It’s Popular
Lens flare adds a cinematic feel that makes images look more dynamic and emotionally engaging. It’s widely used in:
- Portrait photography
- Landscape shots
- Film-style edits
- Social media visuals
How Photeeq Lens Flare Works
Understanding how lens flare behaves helps you use it intentionally instead of randomly.
Types of Lens Flare
| Type of Lens Flare | Description | Best Use Case |
|---|---|---|
| Veiling Flare | Soft haze reducing contrast | Dreamy portraits |
| Ghosting Flare | Circular light artifacts | Artistic compositions |
| Starburst Flare | Sharp rays from light source | Sunset or city lights |
| Anamorphic Flare | Horizontal streaks | Cinematic visuals |
Each type creates a different mood, so choosing the right one matters.
How to Create Photeeq Lens Flare
You can create lens flare either in-camera or during post-processing.
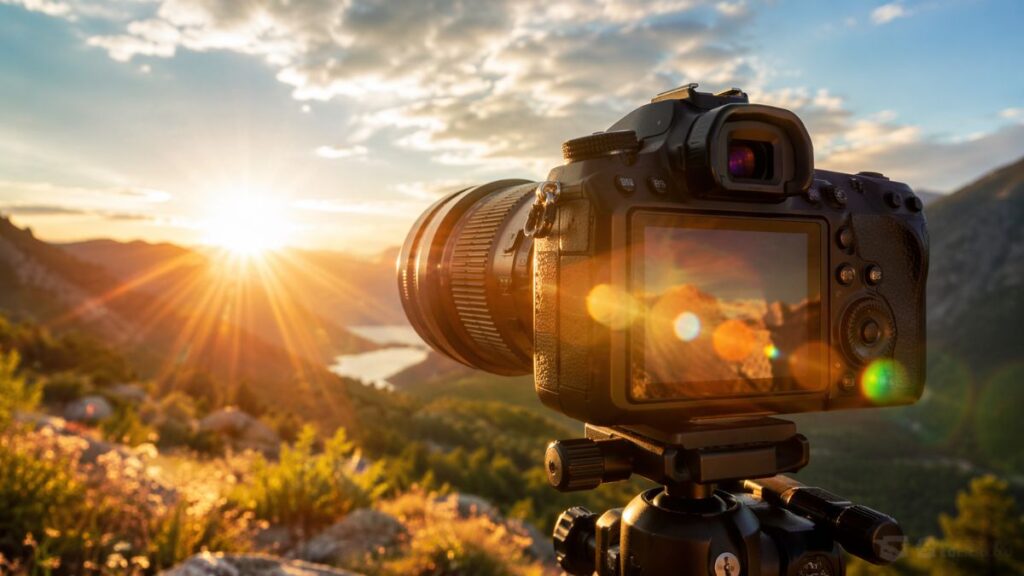
Shooting Lens Flare Naturally
Here’s how to capture it while shooting:
- Position your camera toward the sun or bright light
- Slightly tilt the lens to control flare intensity
- Use a lower aperture (f/16 for starburst effects)
- Remove the lens hood to allow more light
Adding Lens Flare in Editing
Editing tools make it easier to apply precise effects.
Basic Steps:
- Open your image in editing software
- Select lens flare overlay or filter
- Adjust brightness, opacity, and angle
- Blend naturally with the scene
Best Settings for Lens Flare Photography
| Setting | Recommended Range | Purpose |
|---|---|---|
| Aperture | f/8 – f/16 | Creates sharper light rays |
| ISO | 100 – 200 | Keeps image clean |
| Shutter Speed | Adjust based on light | Controls exposure |
| Lens Type | Prime or wide-angle | Enhances flare effect |
These settings give you better control over how flare appears in your photos.
Woeken: The Complete Guide to Understanding, Strategies, and Practical Use
Creative Uses of Photeeq Lens Flare
1. Enhance Emotional Impact
Lens flare adds warmth and nostalgia. It works especially well in:
- Wedding photography
- Travel shots
- Lifestyle portraits
2. Add Depth and Dimension
Instead of flat lighting, flare creates layers within the image.
3. Highlight a Subject
Use flare strategically to draw attention toward your subject.
4. Create Cinematic Effects
Filmmakers often use lens flare to make scenes look dramatic and polished.
Pros and Cons of Using Lens Flare
Pros
- Adds artistic appeal
- Enhances lighting naturally
- Creates cinematic visuals
- Improves storytelling
Cons
- Can reduce image clarity
- May look artificial if overused
- Difficult to control in-camera
- Can distract from the subject
Common Mistakes to Avoid
Even though lens flare looks great, beginners often misuse it.
Overusing the Effect
Too much flare can ruin the image instead of improving it.
Poor Placement
If flare covers the subject’s face, it becomes distracting.
Ignoring Light Direction
Unnatural light placement makes edits look fake.
Lack of Balance
Combining flare with already bright images can cause overexposure.
Best Practices for Using Photeeq Lens Flare
Keep It Subtle
Less is more. A soft glow often looks better than intense streaks.
Match Lighting Conditions
Ensure the flare direction matches the actual light source.
Use High-Resolution Overlays
Low-quality effects can ruin the overall image quality.
Experiment with Angles
Small changes in angle can produce completely different results.
Practical Example
Imagine you’re editing a sunset portrait.
Instead of leaving the photo flat, you:
- Add a soft warm flare from the top corner
- Reduce opacity to 30%
- Blend it with natural sunlight
The result? A more emotional, visually engaging image.
Quick Comparison: Natural vs Edited Lens Flare
| Feature | Natural Lens Flare | Edited Lens Flare |
|---|---|---|
| Control | Limited | Highly customizable |
| Realism | Very realistic | Depends on editing skill |
| Flexibility | Low | High |
| Time Required | Requires perfect timing | Faster in post-processing |
Conclusion
A well-executed photeeq lens flare can transform an ordinary image into something visually striking. Whether you capture it naturally or add it during editing, the key is subtlety and intention.
By understanding how light behaves and applying the right techniques, you can create photos that feel cinematic, professional, and emotionally rich. Keep experimenting, stay creative, and refine your style over time.
FAQs
1. What is photeeq lens flare used for?
It’s used to add artistic lighting effects that enhance mood and visual appeal in photos.
2. Can beginners use lens flare effectively?
Yes, with basic understanding and practice, beginners can achieve great results.
3. Is lens flare better in-camera or in editing?
Both methods work well. Shooting naturally offers realism, while editing provides control.
4. Does lens flare reduce image quality?
It can reduce contrast if overused, but proper adjustments can maintain quality.
5. What type of photography benefits most from lens flare?
Portrait, landscape, and cinematic photography benefit the most.